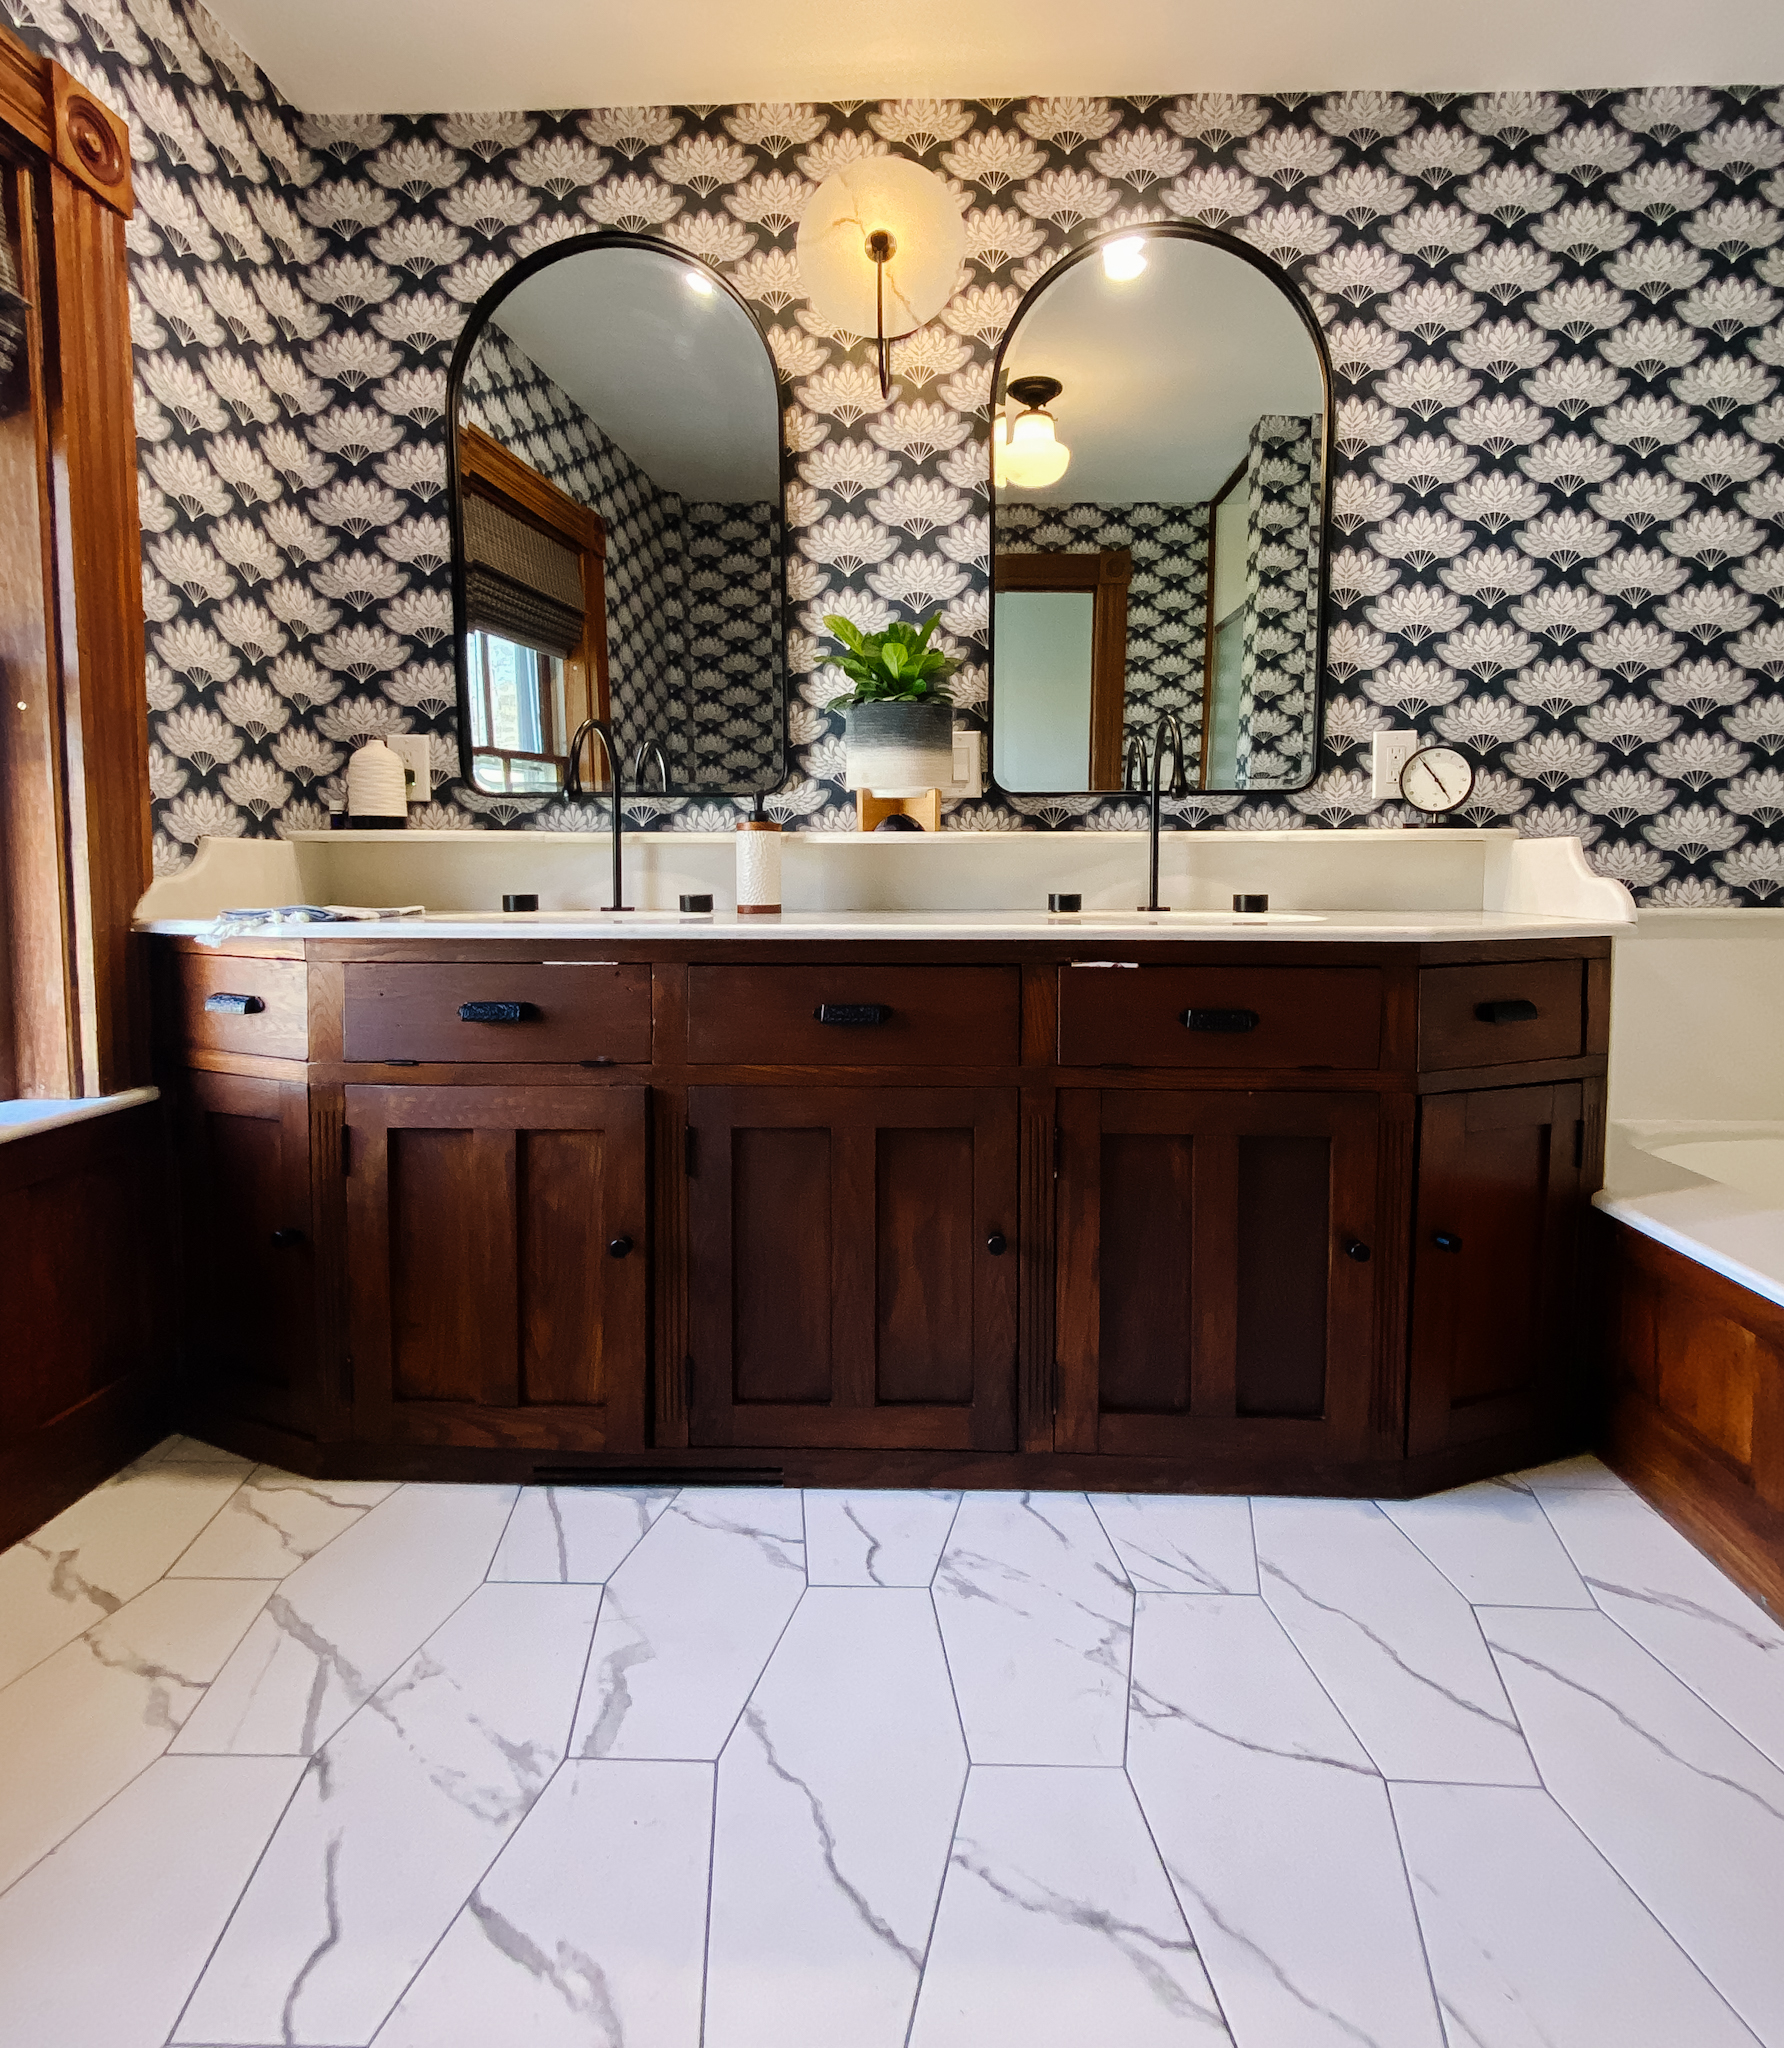
Follow along to see how we turned a drab 1970s space into this:

Whenever I have a project that I know is going to be long and require a lot of time and energy. I look for something that can be done in a decent amount of to time that will give me some type of instant gratification to sustain me through the long haul of the rest of the project.
In this particular project we have a whole house to tackle and we have to take care of the not so fun things I referenced in eariler posts like electrical and insulation. So, in the meantime, I decided to give the only full bath in this old home a face lift.
We are functioning in this space as a studio and having a clean updated bath is definitely something that helps get you through the messy and unbecoming parts of a renovation.
So, I made a plan and set my budget & started to dive in.
I decided by adding a new floor, refinishing the existing vanity, updating fixtures and adding a unique wallpaper for a high impact change; I would be able to accomplish what I set out to do: a quick and budget friendly turnaround of this space.
PS: I also have a future plan for the walk in shower using a new to me material I have been wanting to try out. Stay tuned for that!
51 years in the making – From 1971 to now


Sweat Equity
This bathroom was last updated in the 1970s according to the records left with the house by the Vegh’s. (see the above left photos)
I wanted this to be clean, functional and aesthetically pleasing but I also did not want to pile a ton of money into something that is already has a functional layout and style that suits the house.
Where to begin
That is always a hard question and is often also the reason people never get started on, let alone finish a small project that can give you a big reward by just jumping in.
I started with pulling up the floor. At first i was going to use what was there. I didn’t hate it and I found a cool paper that would bring it in and help to update it. Then after being in the space, I realized that the floor was actually compromised forcing me to change directions.
So, I selected a replacement in the form of a porcelain marble tile in an elongated hex pattern to update the space and bring a modern element in. I have a love of mixing old and new. This is an easy way to build character.
Then, I selected lighting that would compliment the house as well as add some more modern elements that would compliment the house.
In my personal projects, I reevaluate choices from time to time throughout the project. I like to make sure that my love of all styles keep a cohesive feel in one particular project and don’t become a mismash of things thrown together.
Building a mood board generally helps to keep any design on track.
Old paper down/ new floor in/fixtures ordered…


Then came making the old “new” again:
I started with papering all the existing walls. This took me a day on my own – this paper installation is not perfect – the walls are very wonky in this space (200 hundred years will make anything/anyone wonky I guess). Keeping things level was a challenge but I took my time and just moved through the process. You have to inspect for the imperfections so I declare this a win – ps: audible is an amazing thing with projects like this!
After the guys did their part with the plumbing and electric, I got in there and took off all the doors to the vanity, removed all the hardware, scuffed and cleaned all the wood. I applied a gel stain to all of the wood on the exterior and a fresh coat of paint (or three) to the interior of the vanity as well as giving all the existing hardware a fresh coat of paint.
WORK SMARTER NOT HARDER
Gel stain is fairly easy to apply as it goes over the wood like paint. Ultimately you wipe it on and then wipe off the excess. I did this using a foam chip brush and a stain sponge.
The hardware and screws got very light coats of matte black automotive paint while i was in the middle of the gel stain coating and drying.
Taking in consideration the time it will take to coat and let things dry is key to keeping a project moving along.
This took me a day to coat the exterior, a few hours and 3 coats to paint the interior and a couple of hours to put everything back into place once it was finished drying/curing.


I think the biggest take away from this finished space is that all of the most expensive components to replace already existed. By leaving them place and using them as a part of the plan it was easy to create a new fresh take on what could have easily been considered a gut job.


Sources:
- Wall Sconce
- Flush mount ceiling light
- Gel stain
- Spray Paint
- Wallpaper – A Street by Brewster in Equinox
- Elongated Hex Floor Tile
- Faucets